Getting started with Microsoft Teams Development - Part 2
Part 2: ngrok why and how to use it
This blogpost is part of a series about Microsoft Teams development. The other ones are:
- Part 1: Setting up your development environment
- Part 2: ngrok: why and how to use it (This one)
- Part 3: Creating your first Microsoft Teams app
- Part 4: Creating Configurable Tabs in Microsoft Teams
One of the main reasons for writing this specific post which is not specific to Microsoft Teams development is the misconceptions there exist around ngrok. I’ve seen to many (especially Microsoft code examples) which specify that you cannot use a custom subdomain and that you are stuck with “https://SomeRandomThing.ngrok.io” unless you pay up. This is not true… It’s just if you want to claim the subdomain as you’re own… then you have to pay… but more in the blog post below.
When developing against Microsoft Teams or even other cloud-based environments the debugging story is always hard. Of course, you can use the remote capabilities of an Azure web app https://docs.microsoft.com/en-us/azure/app-service/troubleshoot-dotnet-visual-studio, but this is not always easy to use.
Another way to do this is to use ngrok. ngrok is mostly known for developing webhooks. It will provide you with a public url. This url will then be tunneled to your local device effectively giving you an endpoint available in the cloud. It’s like putting your local machine’s on a public IP. Now to do this ngrok needs something that runs on your device to setup the tunnel. So download the tool from there website and you’re good to go… but not quite.
Getting started
After you downloaded the zip file you will notice that there is only a single exe inside of it. Put it in a folder on your drive and open a command line. Now go to the folder and then start ngrok by typing the command ‘ngrok http 80 ‘ this means start ngrok and map port 80 on http. Cool thing is that when the tools start up it will create 3 url’s for you. 1 on an http endpoint, 1 on an https endpoint and a localhost webserver which you can use to inspect what is going over the wire. Let’s see this with an example:
Creating a new project
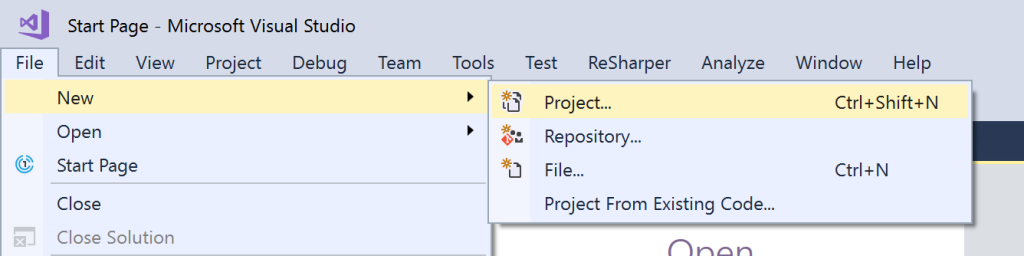
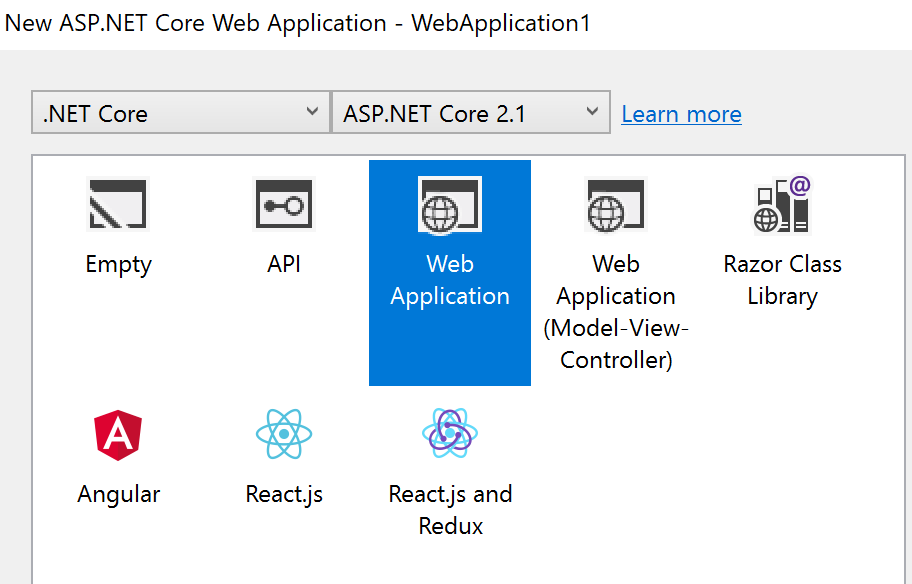
Firstly, we need to have some code running on localhost. So open Visual Studio and create a new project.
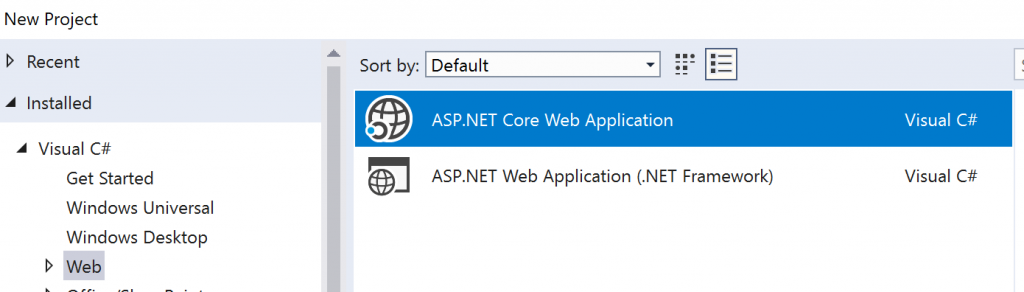
Now we need a website so choose a web project. This can be an asp.net core web app or an old fashioned asp.net web application. For this example this doesn’t matter because we are not going to do much with it. I’m with the cool kids now so I chose a core app.
Next choose a web application so that we get some basic scaffolding.
Now your default test web app is ready. If you now press start (F5) then you will see a page popping up.
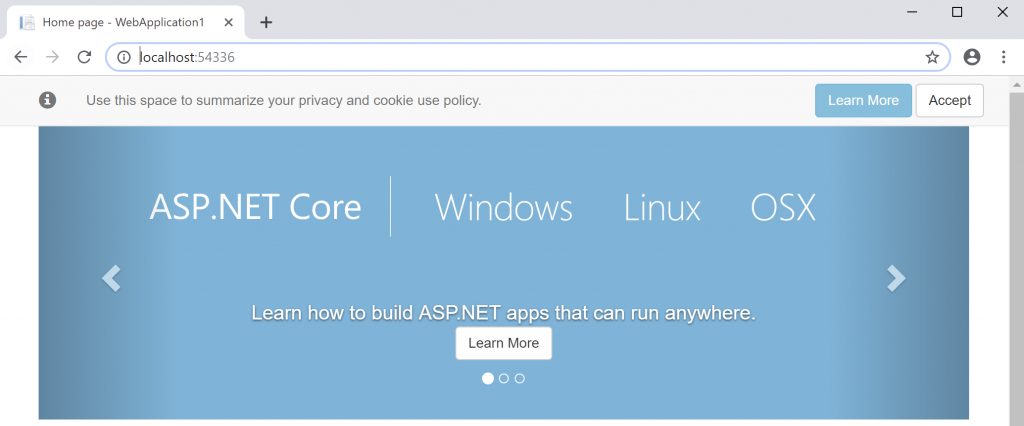
Take notice of the url of the web application. It’s now running on my local machine. Which means that nobody (person or system) can reach my web application. Now let’s go back to our command line. We now want our web application to be publicly available. Since this is running on port 54336 we need to let ngrok now this. So the following command will do this: “ngrok http 54336 –host-header localhost”

If we now go to the provided url we can also reach our web application
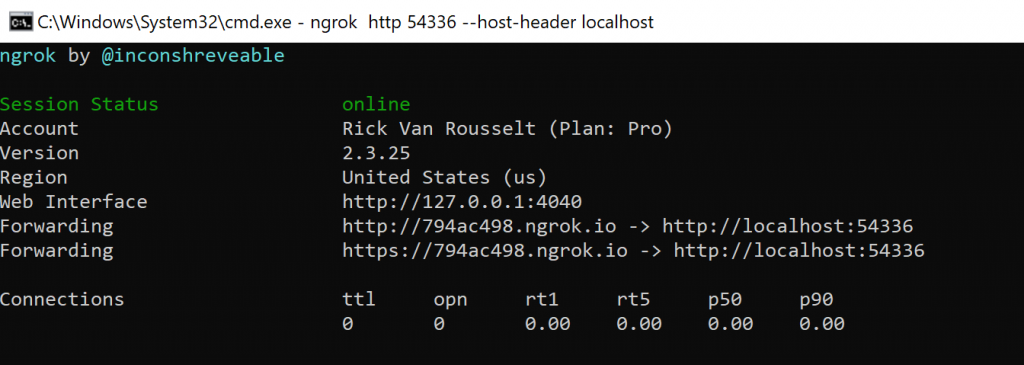
In this case it’s http://794ac498.ngrok.io or https://794ac498.ngrok.io Which is actually really good because when you develop on Microsoft Teams it always expects an HTTPS endpoint. And ngrok provides one for free.
The host-header part of the command is for Visual Studio. When you are going to your web application it knows that it’s running on localhost. This means that connecting to it with another url it will fail. This will rewrite the host-header part of the request to let Visual Studio think that it’s still being connected to from localhost.
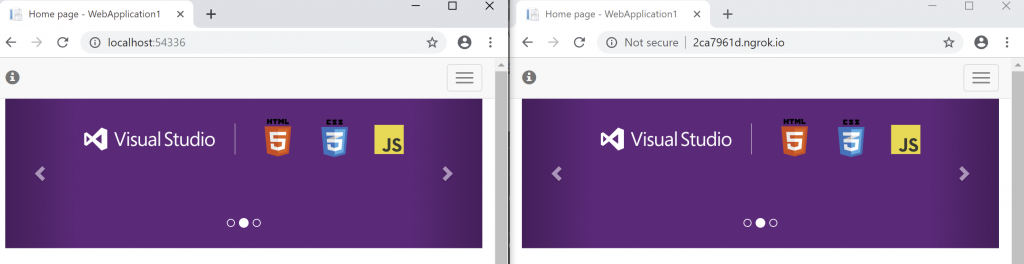
If we now go to one of the 2 provided url’s, you will see your web application also there. This means that a system running in the cloud (like Teams) also can connect to it.
Now this is the basic’s of running ngrok. You can already image that always doing this will get annoying after a while so next are some tips and tricks
Create a configuration file
Ngrok can also work with a config file. This way you don’t need to enter this long command all the time
First create an auth token. This can be done by creating an account on there website. You can have a paid account if you want but it’s not required. I just linked the account to my github which makes login so much easier. Now after creating an account on the left in your dashboard you will see your auth token. The command is also specified. Be aware that if you are using Windows like myself that you must change the command a little bit. You can remove the $ ./ Just enter “ngrok authtoken ” in the command line. This will save the auth token to a configuration file. In my case it’s located under my user directory.

Now this configuration file can be used to specify all your settings.
If you want the exact same thing as we did before your configuration file should look like this.
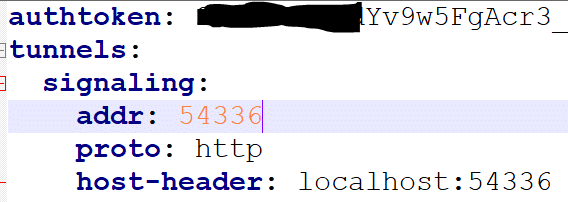
Now be aware that this configuration file is a yaml file. So the spaces and tabs really have a meaning. It’s like Python programming, if you put something not in the correct indentation you can lose hours (like I did) with searching for a reason why something is not working.
Add subdomains
Now if you need the public url where you’re code is running on…. like for instance in your manifest when you develop on Microsoft teams it’s a pain to change this every morning or every time you start developing again. So it would be nice if the url is always the same. This can be done with the “subdomain” configuration. So an example of my configuration file for a Teams app that I’m building looks more like:
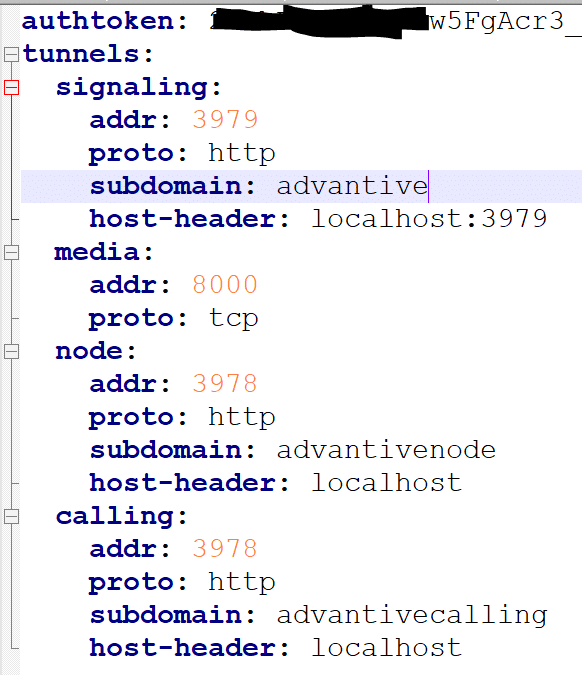
This means that every time I fire up ngrok that different app’s that can be running on different ports are mapped correctly to their subdomain. This way I don’t need to update the manifest when starting in the morning.
Now to start ngrok with all these different settings just type ‘ngrok start –all’ (the all stands for all the different configuration inside the config file. If you want you can also start a single one. That’s why they all get a different name)

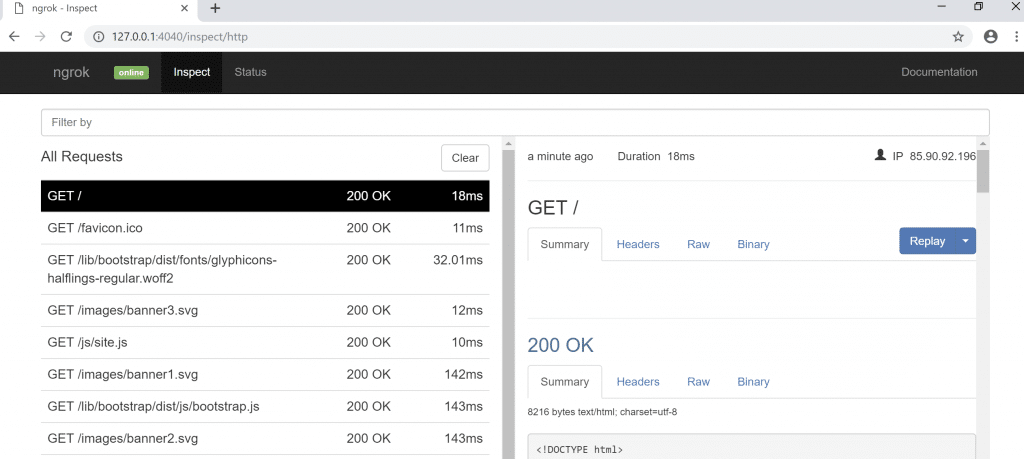
Inspection of what is going over the wire
You already noticed the 127.0.0.1 url. This is a small webserver that comes with ngrok where you can inspect your requests. Think of it as the small brother of Fiddler https://www.telerik.com/fiddler
If you browse to this url (ngrok must be running) then you can check out the requests and their answers. This is helpful sometimes when doing Teams development. Especially when creating bot’s because they are quite chatty over the wire. This will even allow you to replay a request if needed.