SPAdminBot: How to install in your own environment
With releasing the SPAdminBot almost a week ago, I got some great response. But I also forgot to mention some items in my previous blog post. The steps to take on how to install this in your own Azure environment and use your own bot ID’s. In this post, I will go through the detailed steps on how to get the SPAdminBot up and running.
SPAdminBot in First Release
This is an ideal scenario. Because now the bot is running where people can use it all the time, I simply cannot just take it offline, do some testing or try out new features. That’s why I am also publishing a First Release version. Mmmm.. Guess where I got that idea This First Release mode will give me the chance to test out new features. I’ve forked the GitHub repository so that there is now also a FirstRelease branch. The flow off the deployments will now be: 1. Development on Dev Branch 2. Merge to First Release 3. Merge to Master I think that for now this setup will do. I am also using Visual Studio Online to build and deploy directly to Azure. But more on this in another post. So if you want to test out the new features you can do this here:
I’ve also created a few video’s on the default behavior of the SPAdminBot. You can find them on the YouTube Channel I created for the SPAdminBot
Fork the repository
First thing you have to do is fork the repository. This can easily be done in the GitHub website. If you don’t have an account yet, then you should first create one. Go to the SPAdminBot repo and press the fork button. It’s the big button in the top right. This will create a branch of the repository in your own set of repositories.
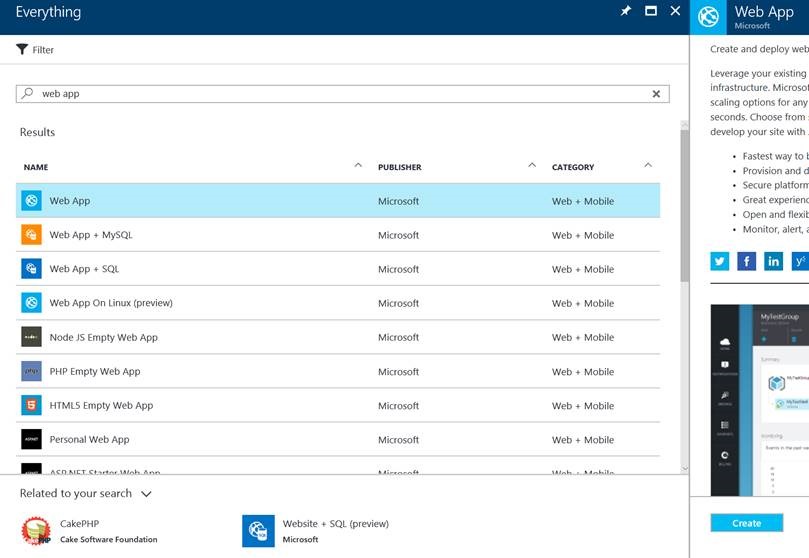
Create an Azure Webapp
If you search in the Azure Marketplace for Web App then the first one you find is an Azure Web App. This is a website hosted in Azure.
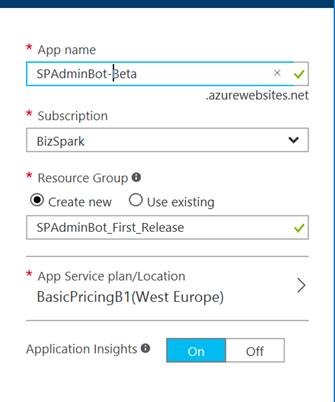
Click on create and you can fill in the details of your web app. Below is a screenshot of the things I filled in. And here’s a tip. Try to always put items that group together in a separate resource group. When you want to stop your testing then they are easily removed all together by removing the resource group. Instead of deleting them one by one which sometimes can take forever.
Create your own bot
Login with your account to the https://dev.botframework.com/ site. Here you are able to create your own bot. Click on “Register a bot” and fill in the form. Choose a name you want to give to your bot and for the bot handle you need to specify an easy name. This is used in the url for your bot so choose something simple. If you want you can also fill in a description. The messaging endpoint is where the bot framework will send the messages it receives to. So in this case take the url from the webapp you created earlier (the url can be found in the overview page of your web app in Azure) and add “api/messages” and off course make it ‘https’ to it. The Url will look something like this: https://.azurewebsites.net/api/messages. Now you need to create an app id and secret. Microsoft has made this real easy so just click on the button “Create Microsoft App ID and password” and it will take you to another screen that will create you an app id and secret. Don’t forget to copy these somewhere because you will need them later on. Optional: If you want you can add an app insights key. You can reuse the app insights key from the web app you created earlier. The key can be found under the properties menu when you open up the app insights in Azure.
Add an Active Directory App
Go to the AD blade in Azure and under the app registrations menu add a new AD app. Choose an appropriate name, the application type is web app/api and the sign on url can be the url from the webapp you created earlier. Don’t worry the url can be changed later if needed. Now open up the newly created AD App and change the following items. - App ID URI: This is a unique identifier for your app. You don’t need to change this but if prefer a clean url instead of the guid one you get. - Home page URL: Here you can add the home page of your bot. So the url of the webapp you created earlier. This isn’t required but hey while where at it why not. - Logout url: Here you need to specify the logout screen for your app. We don’t really have one because the SPAdminBot can sign us out but you can enter the following url https://.azurewebsites.net/api/OAuthCallback (Don’t forget to change it to your webapp) - Put the multi-tenant to ‘Yes’. The SPAdminBot is designed to be multitenant. Open up the Reply Url’s menu and add the following url: https://.azurewebsites.net/api/OAuthCallback. If you plan to debug the code locally then you should also add a localhost reference. Ex: When I open the solution and press start in Visual Studio then it start on http://localhost:3979/. This can be changed in VS so this could be a different url for you. So in Azure AD I should reference the url: http://localhost:3979/api/OAuthCallback so that the authentication part works when debugging locally. Then for the required permissions. You can find the list on this wiki page from the SPAdminBot I know I’ve selected a lot of them. I will try to reduce this list some more in the future but on the other hand… It’s an Admin Bot Now the only thing left is to generate a key. Go to the keys menu. Give it a name and an expiration time and hit the save button. Now the key is show. Save it somewhere because if you leave this page it’s never shown again. Also copy the app id and save it because we will need it later on.
Deploy the SPAdminBot
Go back to the web app you created and download the publish profile. Open up the solution from the SPAdminBot in Visual Studio and use the publish profile to deploy the solution to the web app.

Click on the ‘Get publish profile’ button in the web app overview menu
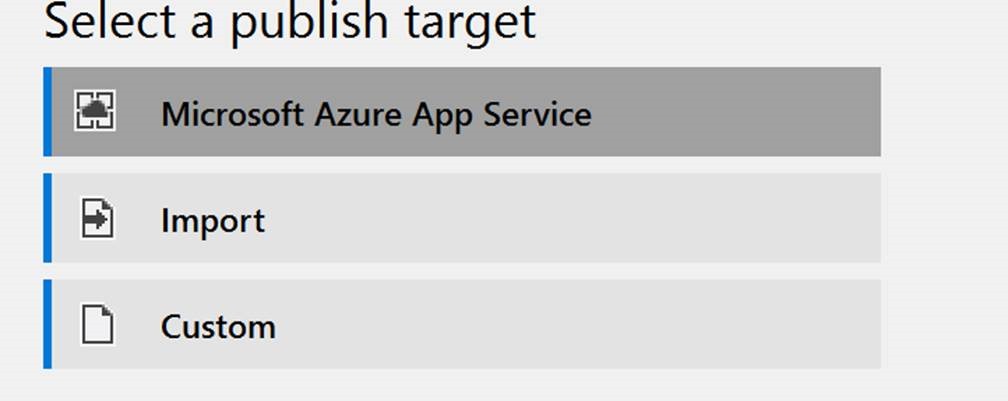
Right click on the SPAdminBot project and select publish. In the following screen select import. Select the file you just downloaded. Then hit the finish button. Now your version of the SPAdminBot is deployed to your azure web app. Now on to the configuration.
Application settings
Open up the web app’s application settings and enter the following information: BotId: The bot handle you defined when registering the bot. MicrosoftAppId: The app id you got when you registered the bot MicrosoftAppPassword: The password you got when you registered the bot ActiveDirectory.ResourceId: https://graph.windows.net : This is the first resource requested. We are first requesting access to the Microsoft Graph then later on in code to SharePoint Online ActiveDirectory.EndpointUrl: https://login.microsoftonline.com : This is for authentication ActiveDirectory.Tenant: common. (This normally is your tenant id(guid) but because the app is multi-tenant we have to go through the common endpoint) ActiveDirectory.ClientId: The id from the Azure AD App you created ActiveDirectory.ClientSecret: The secret from the Azure AD app you created ActiveDirectory.RedirectUrl: https://.azurewebsites.net/api/OAuthCallback iKey: your Application Insights instrumentation key Now you are up and running. If you go back to where you created the bot under the ‘My Bots’ menu you can test your bot. This now returns ‘accepted’ when you hit the test button and you should get a response when talking to the bot. Now you have your own version of the SPAdminBot up and running.
Optional
The only thing that is not configured to run on your credentials is LUIS. If you want to set this to your own LUIS app go to https://www.luis.ai create a new app and update the id and secret in the RootLuisDialog class. I’ve added the app data json file to the GitHub repository and will keep it updated as project evolves. Don’t forget you can always contribute to the project on GitHub