Stop using ClientID and Secret to access your Office 365 services
So you are building an application. When following most of the guidelines you find online they will tell you that you will need to use an Azure AD App Registration. This Azure App registration will provide you access to an Office 365 service like the Microsoft Graph, SharePoint, Exchange,… This can either be delegated or application permissions. This post is about application permissions.
The problem
For application permissions (app only), you need a client ID and a secret. And to access SharePoint you even need to create a certificate and upload that to your Azure AD app registration. I’ve done this plenty of times and if you want to know more about how that works there is an excellent blog post from Bert Jansen. While this works great, it is a cumbersome procedure. You need to store the certificate or secret somewhere. You need to refresh it from time to time. So there must be a better solution.
Managed Identity to the rescue
Managed identities have existed for a while now in Azure. If you haven’t heard of it. The simplest comparison is that for example, Microsoft will convert the web app running your code into a known “App” like identity. It will create a Service Principal and link that to your web app. It won’t show it in the UI but it’s there in the background, it’s like a special type of Azure AD App registration. The cool part is that they create a certificate and link it to that registration. Azure will then refresh that certificate if needed and nobody will be able to download it. Increasing security in your environment. It’s a little more nuanced than that because you can create 2 kinds of Managed Identities, a System-assigned and a User-assigned.
System-assigned managed identity
So if you go to the identity tab in your web app in Azure you can select to create a System-Assigned managed identity from it. It’s as simple as flipping the switch. (There are also user-assigned managed identities but we are not going deeper in those)
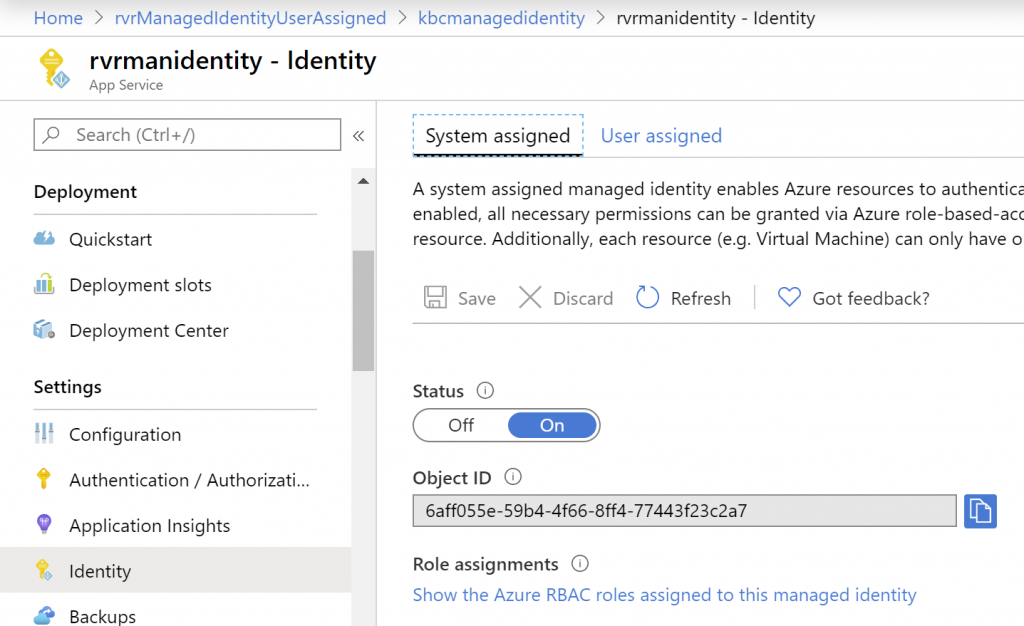
Enabling System Assigned managed identity for an Azure Web App.
When the identity is enabled, Azure creates an identity for the instance in the Azure AD tenant that’s trusted by the subscription of the instance. After the identity is created, the credentials are provisioned onto the instance. The lifecycle of a system-assigned identity is directly tied to the Azure service instance that it’s enabled on. If the instance is deleted, Azure automatically cleans up the credentials and the identity in Azure AD.
As you see, you are getting an object id from the service principal that was created. This special type of App registration will not show up the UI but we can access it with the Azure CLI. With the Azure CLI we can also give it access to for instance SharePoint with App-Only credentials. To do that you will need the correct GUID identifying the SharePoint API. Every API you can access in Azure also has an identity. I’ve created a reference table here to make it easier. Chances are that the one you need has a ‘special’ GUID.
Ok, now show some code
Let’s say I needed to have App-Only credentials to connect to SharePoint Online. In that case, I would need to give my Service Principal access to SharePoint. Open up your Cloud Shell and execute the following script.
This will give you all the App-Only Permissions available for SharePoint Online. Now let’s say I want to update all sites in my tenant (for example adding a field). So I would need to give the Managed Identity of my web app access to the SPO API with ‘Sites.FullControl.All’ permissions.
The configuration is now complete. Time to add this in code. If you want to authenticate with Managed Identity you will need to add the Nuget package “Microsoft.Azure.Services.AppAuthentication” and to get your authentication token you only need to add 2 lines of code.
 var azureServiceTokenProvider = new AzureServiceTokenProvider();
 string accessToken = await azureServiceTokenProvider
               .GetAccessTokenAsync("https://<yourTenant>.sharepoint.com/");
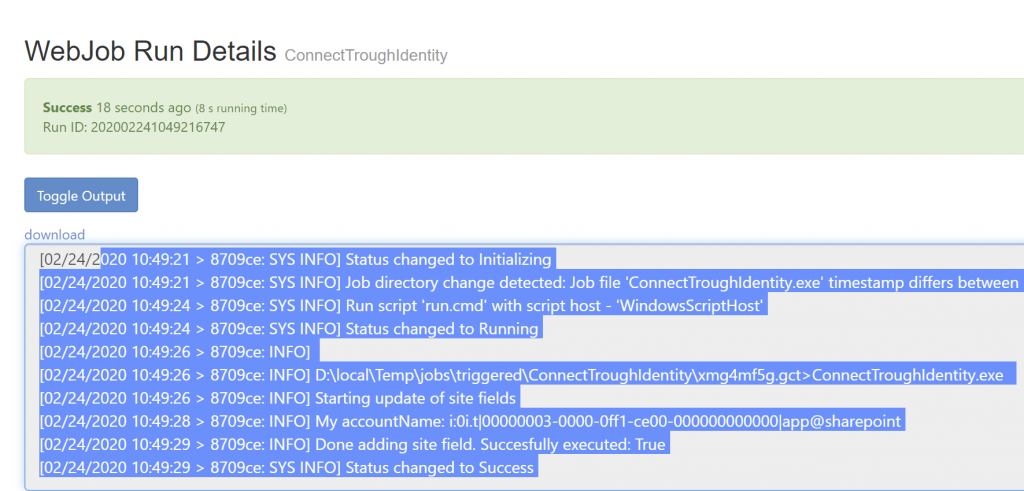
Don’t forget to change the URL to your own Tenant. This will provide us with a bearer token that we can use in CSOM to connect to SharePoint. Now to show you what the difference is when using Managed Identity I also log the current user logged in.
As you can see from the output. When I run the code on my dev machine it’s my user that’s logged in. If I run the code inside of my Azure Web App you get the SharePoint System account name returned. For this, I also added User.Read.All permissions to my App-Only permission list

Updating from VS on my dev machine
Updating from Azure Web App with Managed Identity Activated.
Conclusion: The good and the bad
Now as you can imagine this method has benefits and drawbacks. On the positive side:
- No more managing secrets and/or certificates
- The dev only log’s in with his credentials and the production code uses the App-Only credentials.
- If the Web App gets deleted then the Managed Identity is automatically removed
- This works on Web Apps and Azure Functions
- Works in C# or Node.JS
But on the negative side: How do we countermeasure if things go wrong? It’s been a statement since the first computer was built, “It works on my machine”. If the dev only has access to a handful of site collections, and those execute normally, but there is a site that is just a little different and that throws an exception, then there is no way (besides decent logging) that you can find out what the problem is. Therefore we can add Azure KeyVault in the middle. But this would again add an additional component to manage