Setup a SharePoint development environment Part 3
This is the third part of my blog post on how to set up a development farm for SharePoint.
The first and the second part where about preparing the environments and setting up a SQL Server.
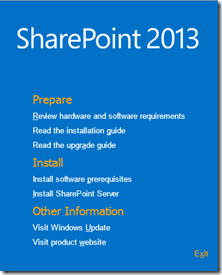
Now we can start installing SharePoint. Let’s begin with the latest SharePoint 2013 version.
Open the virtual machine we made in the first part for SP2013 and enter the SP2013 iso. If you don’t have one you can download it from the Microsoft site.
First things first. You need to install the prerequisites. You will need a internet connection for this one so it can download the needed files. If you want to do an offline installation then you can look at this blog post on where to get them.
• Microsoft .NET Framework 4.5
• Windows Management Framework 3.0
• Application Server Role, Web Server (IIS) Role
• Microsoft SQL Server 2008 R2 SP1 Native Client
• Windows Identity Foundation (KB974405)
• Microsoft Sync Framework Runtime v1.0 SP1 (x64)
• Windows Server AppFabric
• Microsoft Identity Extensions
• Microsoft Information Protection and Control Client
• Microsoft WCF Data Services 5.0
• Cumulative Update Package 1 for Microsoft AppFabric 1.1 for Windows Server (KB2671763)
After the installation of the prerequisites is complete and the virtual machine is rebooted we can start installing SharePoint 2013.
After entering your key or trial key you will have to choose which server type installation you will use.
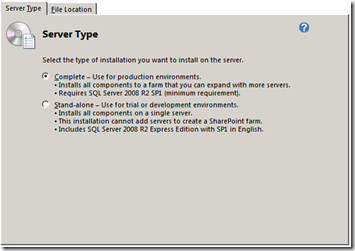
For this installation we will choose the complete installation. If you want then you can change the file location in the second tab.
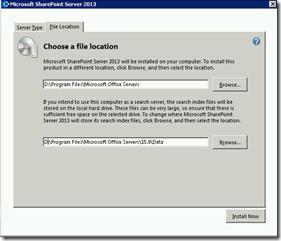
Press install and wait for your SharePoint 2013 installation to complete. After the installation is complete don’t forget to uncheck the “Run Configuration wizard” checkbox. We’ll do it with PowerShell to completely control several aspects of the configuration of our server.
Workflow Manager 1.0
Optionally we can install workflow manager on the server. This will allow us to use workflows in our SharePoint environment.
You can download it here.

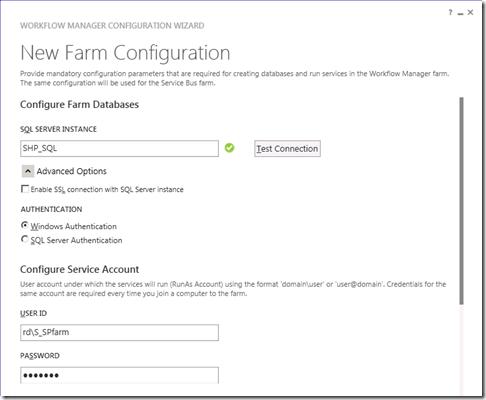
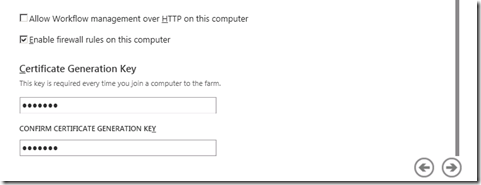
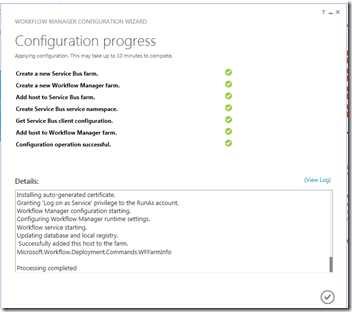
The installation is pretty straight forward. Just install the prerequisites and the workflow manager. Configure the workflow manager with the default recommended settings. Enter your SQL alias name and the farm admin account you created. You will also need to enter a certificate generation key. Don’t forget to check your connection to the SQL server.
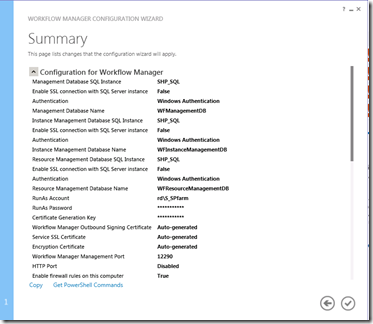
After we click next we get a cool summary of the setting. Better we make a copy of them and store them somewhere.
Next go back to your Active directory and delegate control to your SharePoint farm account.
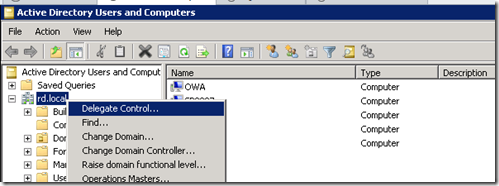
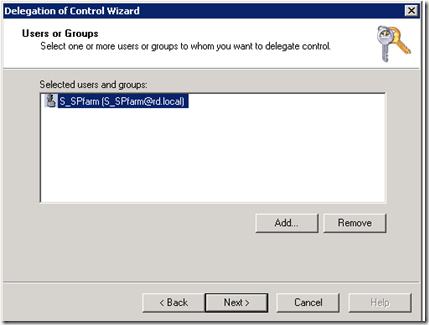
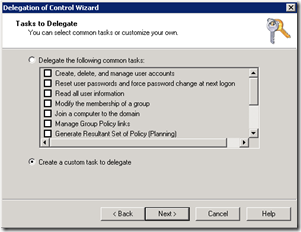
Select “Create a custom task to delegate” and keep the “In this folder” option.

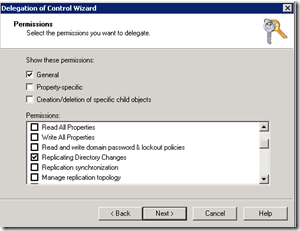
Select “Replicating Directory Changes” and press next. Now a delegation has been given to the farm account.